WARNING:
Please note that this article was published a long time ago. The information contained might be outdated. WARNING:
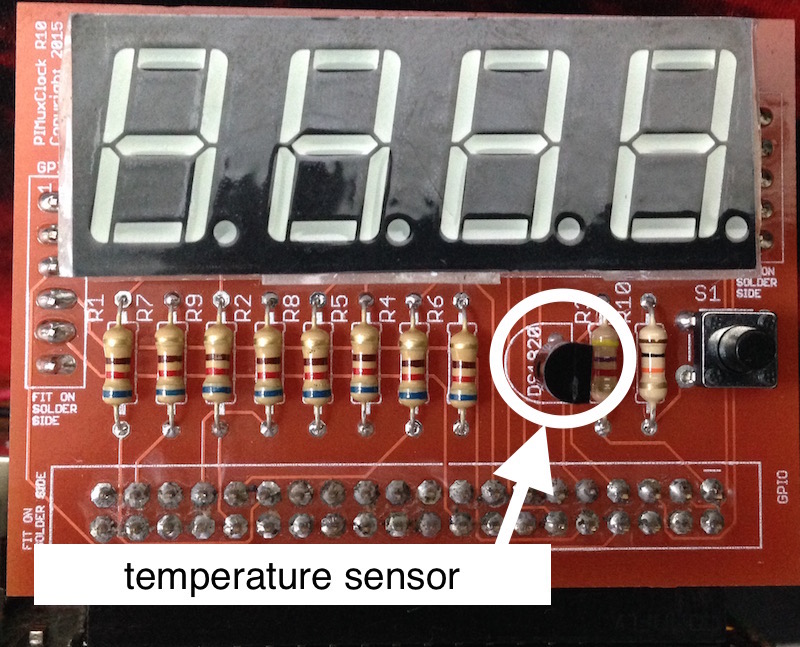
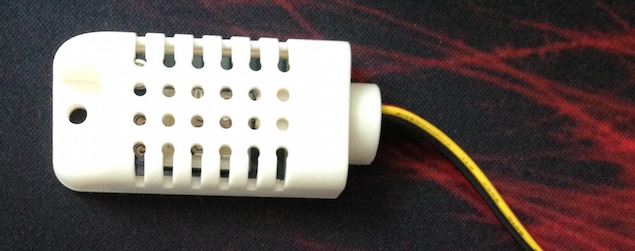
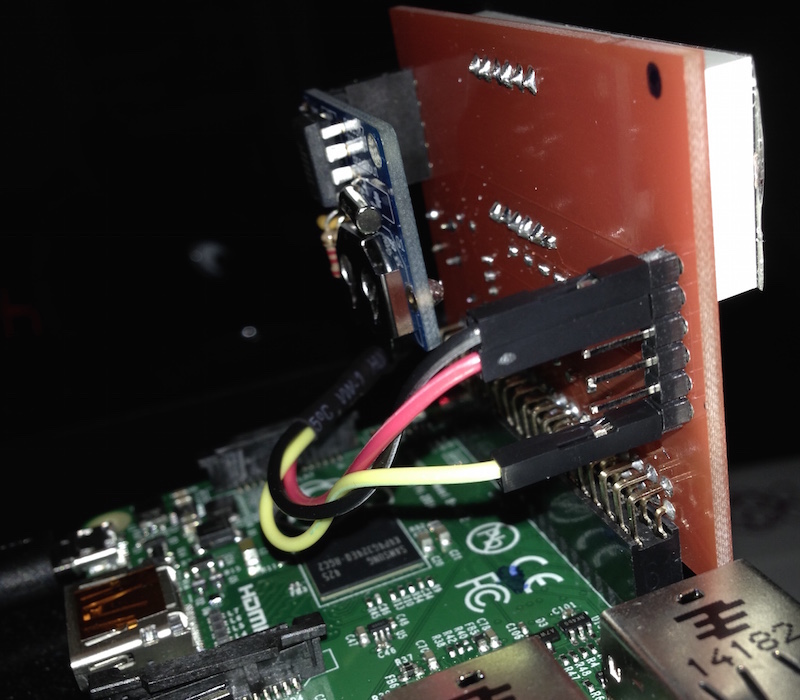
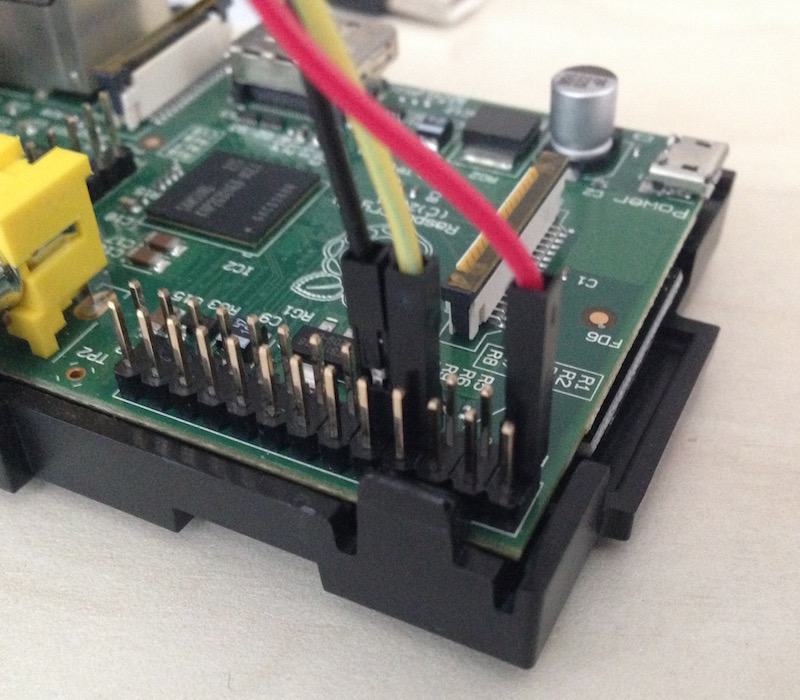
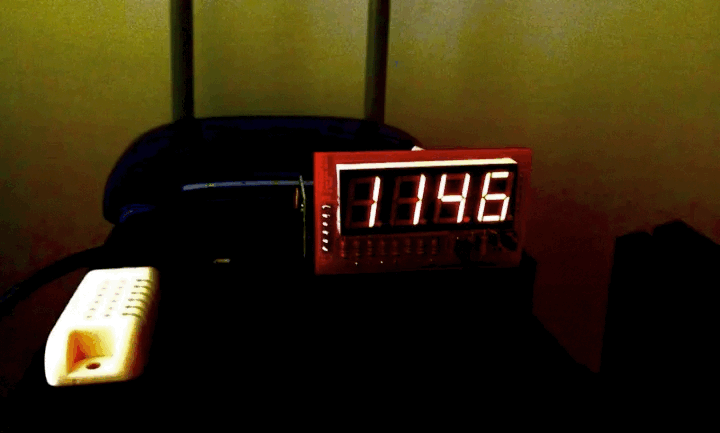
Please note that this article describes my experience and the results you might get reproducing what I did will surely be different. Please understand that I am not responsible for the results you might get reproducing what I did. If you choose to follow my notes and anything bad happens, don't blame me, you are responsible for what you do. In doubt, my advice is to go and read some news on https://news.google.com/. These last days I've been doing some experiments with a couple Raspberry Pi peripherals: the PiMuxClock and the AM2302 (wired DHT22) temperature-humidity sensor (I use a slighly different version but it's i. The version of the PiMuxClock I'm using is the "Enhanced" version. It has a built-in DS18B20 temperature sensor, a connector for a real time clock, and some extra GPIO connectors. The problem with the temperature sensor is that it's located in a hot place, where the temperature is always higher than the room temperature. The solution to the temperature monitoring problem the is the Adafruit AM2302. This device has pretty long wires so it can be placed far from the Raspberry Pi, and provides also a humidity sensor. I found a good tutorial on how to setup the Adafruit AM3202 on Instructables. On step six, the post describes how the WiringPi library maps the GPIO connectors of the Raspberry Pi. This mapping schema is very important because, rather than connecting the Adafruit AM3202 directly to the GPIO pins of the Raspberry Pi, I used the extra GPIO connectors located on the PiMuxClock. The Enhanced PiMuxClock provides 6 extra GPIO connectors (refer to the PiMuxClock pdf manual on pages 18 and 19). Merging the information available on Instructables with the ones from the pdf manual, I got the following summary: As described on the Instructable website, I used the wiringPi GPIO Interface library. I followed the inscructions on how to download and compile the library: In the Why six? Because the last pin on the PiMuxClock, the one at the bottom, having physical GPIO number 22, is pin number 6 for the WiringPi library. After changing the Running I'm still experimenting with the PiMuxClock and I'm very pleased with the device. I've added a real time clock and changed the muxprotemp example to show hour, temperature and humidiy. This is what it looks like today: Since I'm not really good with Python, I'll experiment with the PHP implementation of the WiringPi library, not to drive the screen leds, but to read the values of temperature and humitidy and send the data to initialstate.com. During my researches I read a lot of posts and guides on this topic. The best ones are listed below:Hardware


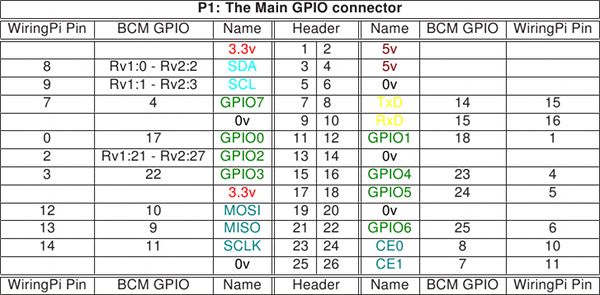
Pin on the PiMuxClock Function definition GPIO Number (BCM) GPIO Number (Physical) WiringPi Pin Number Adafruit AM2302 Cable 1 (top) Ground Black 2 +5 Volts Red 3 gp14 14 8 15 - 4 gp15 15 10 16 5 gp24 24 18 5 - 6 (bottom) gp25 25 22 6 Yellow 

Software
git clone git://git.drogon.net/wiringPi
cd wiringPi
./build
examples directory there are some demo files. I used the rht03.c file and on line 30 I had to change the RHT03_PIN constant value from zero to six.#define RHT03_PIN 6
rht03.c code, I compiled the rht03 executable:make rht03
./rht03 I was able to get the first temperature and humidity values:Temp: 31.2, RH: 53.9%
Temp: 31.9, RH: 51.5%
Temp: 31.8, RH: 51.4%
Final notes
